Using BackBlaze B2 Storage as a Synchronization Target for Joplin
Introduction
If you are already using BackBlaze B2 for storage and you are using Joplin, it makes sense to combine the two. Joplin supports syncing notes with AWS S3 buckets (beta feature at time of writing). How does this help us? BackBlaze B2 provides an AWS S3 compatible API that Joplin can use.
Please see my recommended steps at the end of this tutorial if you are changing from a previous sync target to BackBlaze B2.
Prerequisites
- BackBlaze B2 account.
- Joplin application (Desktop or Mobile) that has the S3 target feature.
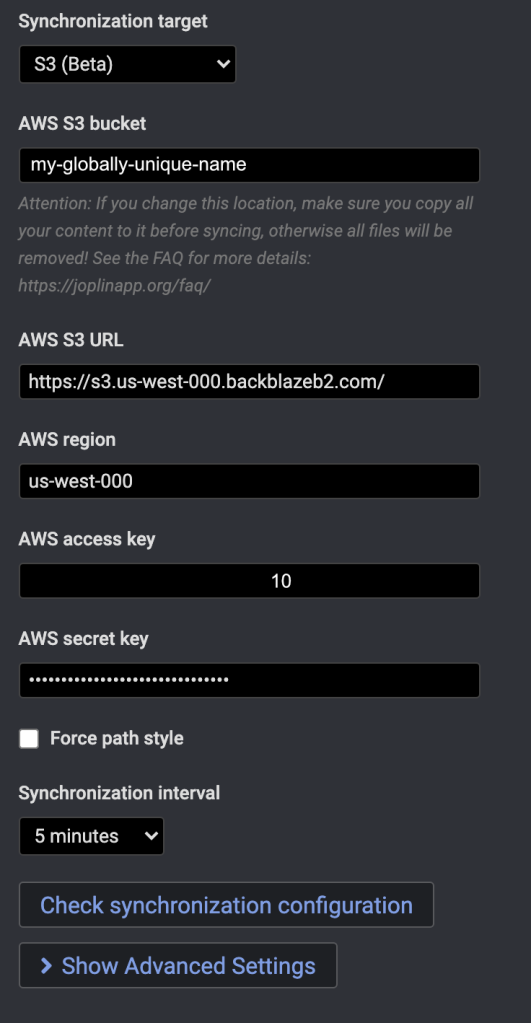
- Using S3 (beta) as the Synchronization target
Required Information to Sync
The following information is required to sync your Joplin notes. BackBlaze B2 provides the information using different names.
| AWS | BackBlaze B2 |
| AWS S3 Bucket | Bucket Unique Name |
| AWS S3 URL | Endpoint |
| AWS region | Region portion of Endpoint |
| AWS access key | keyID |
| AWS secret key | applicationKey |
Creating a Bucket
There are only two things you need to do on BackBlaze B2 to have all of the information you need to start syncing.
- Create a new Bucket that has the Endpoint URL feature.
- Create a new App Key with permissions to new Bucket
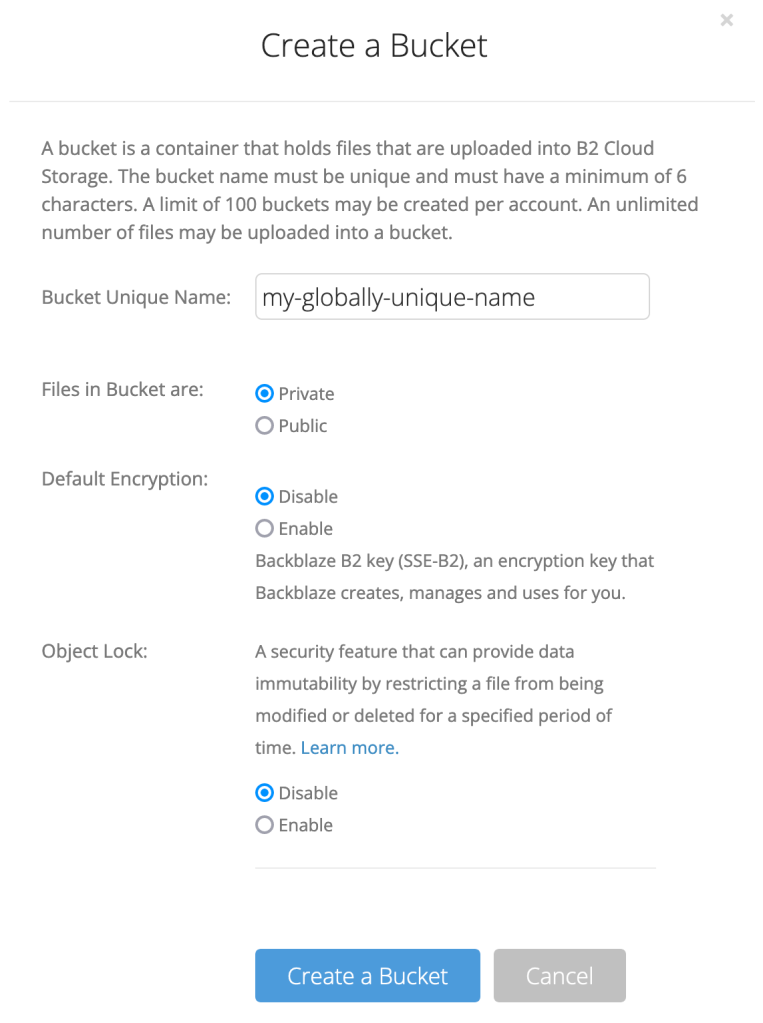
Log into your BackBlaze B2 account and create a new bucket under "B2 Cloud Storage" > Buckets. The unique bucket name must be globally unique across all B2 buckets.

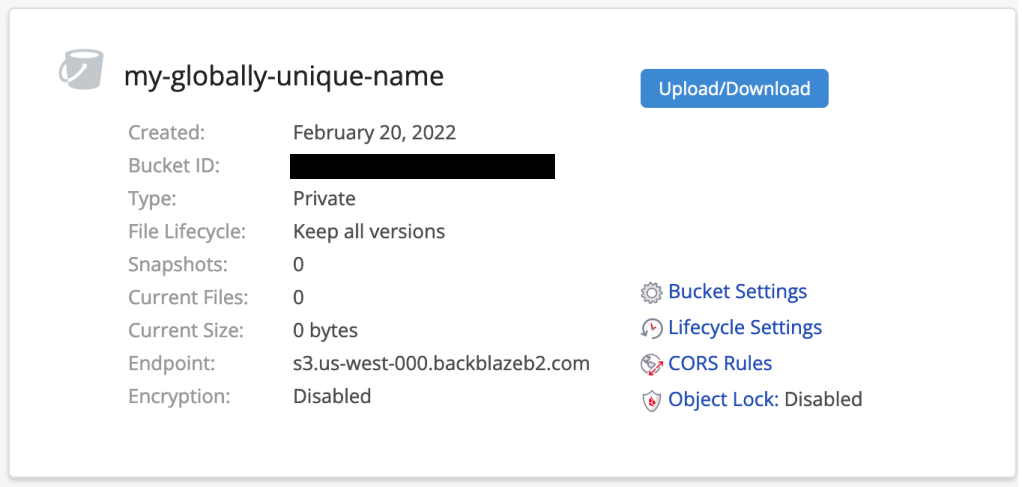
After creating this bucket, you should see something similar to the following screenshot. It contains an Endpoint URL (s3.us-west-000.backblazeb2.com), which we will need along with your Bucket Name. One important thing to note is how the endpoint URL is structured:
(s3).(us-west-000).(backblazeb2).(com)
(service).(region).(domain).(tld)
You will need to extract the region from the URL, as Joplin uses this in the sync target settings.
Bucket Name = AWS S3 bucket
Endpoint URL = AWS S3 URL
Region Portion of URL = AWS region
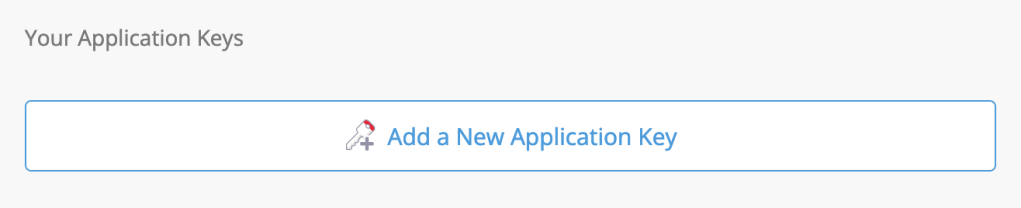
Creating an App Key
Create a new App Key under "Account" > App Keys. This is used with the bucket information to give private access to your bucket via Joplin.
It is recommended to limit the key to only the newly created bucket.
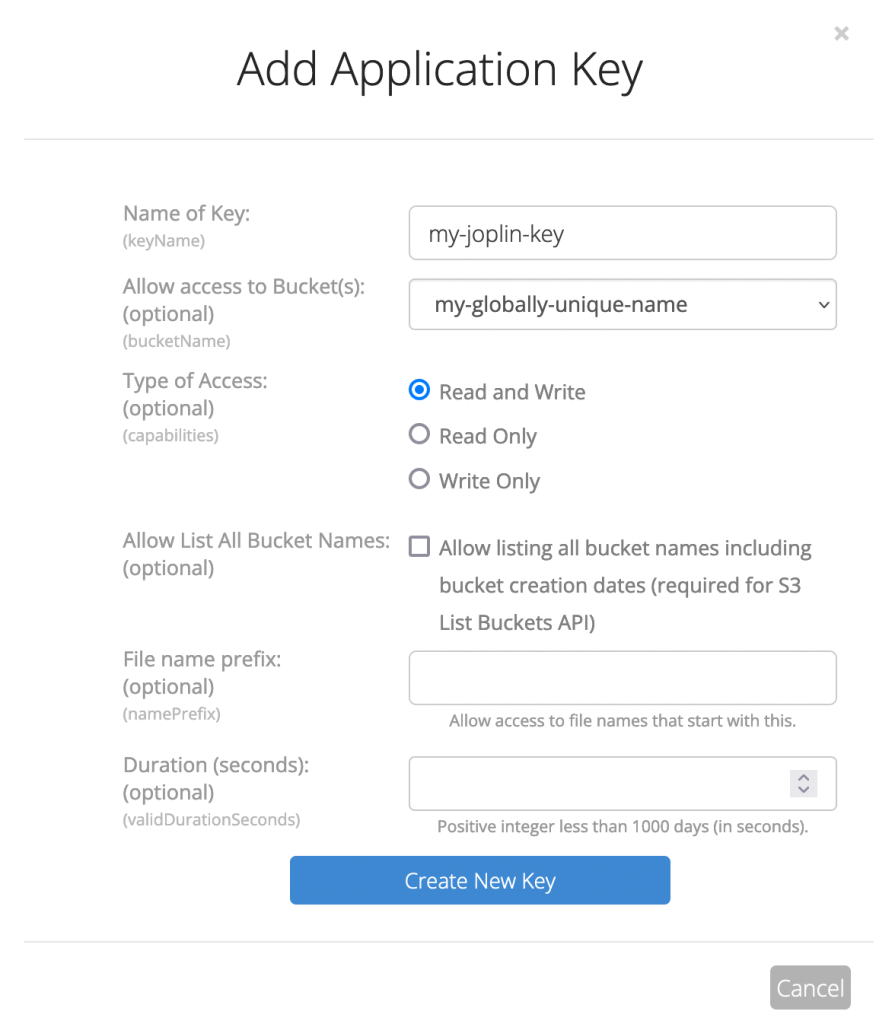

The new key provides the last two items we need to set Joplin as a sync target:
keyID = AWS Access Key
applicationKey = AWS Secret Key
The completed Joplin sync settings are below. (I have already deleted all of the settings created in this blog post, such as the new bucket and app key. So don't get any ideas. 😉)
NOTE
Please see the following section (Preparing Your Data for Sync) prior to applying your new sync settings.
There is a chance of losing your data if you do not follow these next directions.
Preparing Your Data for Sync
I'll be honest, I had a hell of a time getting everything to sync properly. Maybe it is just me, but I wanted to include this section to save others the same pain.
The general workflow is going to be:
- Export all of your Joplin data as a .jex file.
- Rename the /Users/your-username/.config/joplin-desktop folder to /Users/your-username/.config/joplin-desktop-bak
- The provided path is for MacOS, it is generally the same on most operating systems. For instance, in Windows it is %userprofile%/.config/joplin-desktop
- This is done to fallback to a working state if something goes wrong (done by deleting the newly created folder and renaming the backup folder to the original name).
- Open Joplin
- It will be as if you opened Joplin for the first time without any data.
- Set a new encryption Master Key in Joplin.
- Add the new sync target settings and confirm successful sync.
- Import your .jex backup file.
- Sync all of your data to your BackBlaze B2 bucket.
- Done!
Conclusion
There are only a few steps and pieces of information needed to move your notes over to BackBlaze B2. I hope this blog post helps you do make the transition much faster than it took me!
Changelog
- Initial Release
- 2022-02-19