Setting up a Trunk Port for use with VMware Workstation
Update 2024-02-09
I recently tried to set something like this up in Windows 11 and found out that Intel does not support it. I took a bit of time looking for a workaround and did not find anything convenient. There seems to be methods if you use Windows Server and a combination of NIC teaming and VLANs, but I didn’t feel it was really a good solution.
For more information, see this link from Intel.
Intel® PROSet and Intel® Advanced Network Services will not be supported on Microsoft Windows* 11 or future Microsoft client operating system updates. This includes the Intel® Advanced Network Services features that allow the creation of Intel® Advanced Network Services Teams and VLANs. Intel driver support for Microsoft Windows 11 will be available.
Microsoft* Windows 10 is the final Microsoft Windows Operating System to support Intel PROSet and Intel® Advanced Network Services.
The Intel Ethernet team values our customers, and we appreciate your feedback. Contact Intel Customer Support if you have any questions.
Long story short, if your on-board NIC is Intel, your best bet would be to get a Realtek USB NIC and use their Ethernet Diagnostic Program to do the same thing (Windows 11 IS supported).
Introduction
I could not do my job without a lab environment. I do my utmost to ensure that whatever changes I make will not have unintended consequences. Do they happen anyways? Yes. Do they happen less frequently? Also yes. This post will show how to create a trunk port, how to setup the NIC in Windows 10, and how to bridge the virtual adapters to virtual networks within VMware Workstation.
Prerequisites
- VMware Workstation
- Can technically use VMware Player, but requires vmnetcfg.exe from Workstation to configure networking. I will not be explaining how to set this up, as I am unsure of the legality.
- Networking equipment with 802.1q and trunking support.
- Ethernet NIC with 802.1q and trunking support.
Equipment & Software Used
- Juniper EX4300
- VMware Workstation 16.1.2
- Intel I211 Gigabit NIC (built into motherboard, ASUS ROG STRIX B450-F)
- Windows 10 Pro
Initial Setup
The network environment should be setup prior (VLANs, networks, and services like DHCP, DNS, etc). We will only be changing the configuration for a single interface port that connects to your PC.
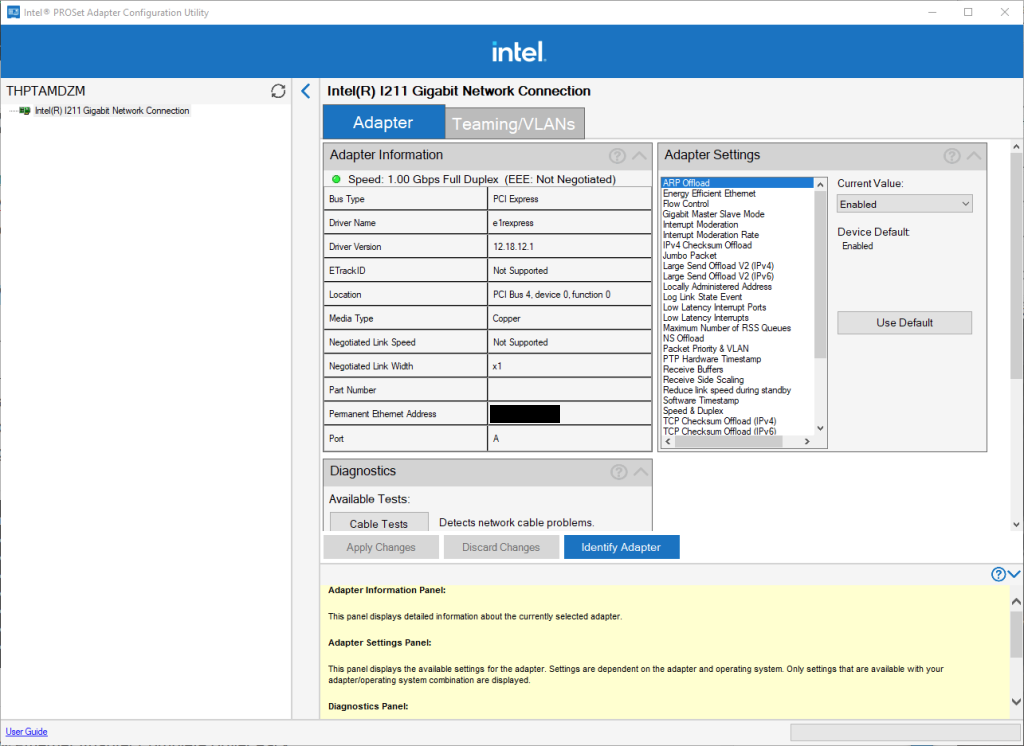
The advanced NIC drivers should be installed on your workstation first. In my case, Intel offers advanced NIC configuration via the Intel® Ethernet Adapter Complete Driver Pack and using the Intel(R) PROSet Adapter Configuration Utility.
Trunk Port Configuration
Now that the driver is installed, hop into your switch. You’ll see my access port configuration below. We’re going to convert the ge-0/0/13 interface from an access port to a trunk port.
show interfaces ge-0/0/13 | display set
set interfaces ge-0/0/13 description "Access Port"
set interfaces ge-0/0/13 unit 0 family ethernet-switching interface-mode access
set interfaces ge-0/0/13 unit 0 family ethernet-switching vlan members WIRED
This port is configured as a member of the WIRED VLAN, but I want to test other networks from within VMware Workstation. For instance, I have a VM that is setup as a Student Windows 10 device. When the VM is a part of the STUDENT VLAN, I can test ACLs, QoS, and emulate how a device will act in its entirety. I also add other VLANs to allow for testing from staff devices and the guest network.
I set the WIRED VLAN (1122) as the native VLAN so that any wired device can still connect. I’ve had issues with NIC drivers crashing. This has left me disconnected due to VLAN trunking being disabled when the driver recovers. By using the native VLAN, I always fall back to a working state. Note: A newer driver version has fixed the crashing issue (26.3).
show interfaces ge-0/0/13 | display set
set interfaces ge-0/0/13 description "VM Trunk"
set interfaces ge-0/0/13 native-vlan-id 1122
set interfaces ge-0/0/13 unit 0 family ethernet-switching interface-mode trunk
set interfaces ge-0/0/13 unit 0 family ethernet-switching vlan members WIRED
set interfaces ge-0/0/13 unit 0 family ethernet-switching vlan members STUDENT
set interfaces ge-0/0/13 unit 0 family ethernet-switching vlan members INSTRUCTION
set interfaces ge-0/0/13 unit 0 family ethernet-switching vlan members GUEST
VLAN Virtual Adapters
The next step is to add the VLAN virtual adapters within the NIC configuration. Click the Teaming/VLANs tab within PROSet (or equivalent tool) to get started. You’ll click New at the bottom to create a new virtual adapter. Upon creating each virtual adapter, the tool may hang. Wait until it responds again.
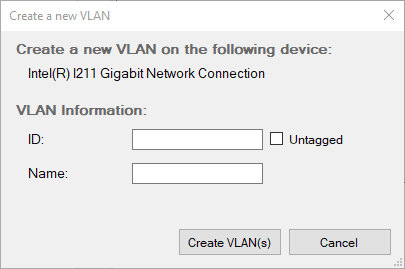
I name each VLAN the same as it is on the switch for easily identification. For the native VLAN, check the Untagged box. All other VLANs should be added using their assigned IDs and leaving the box unchecked.

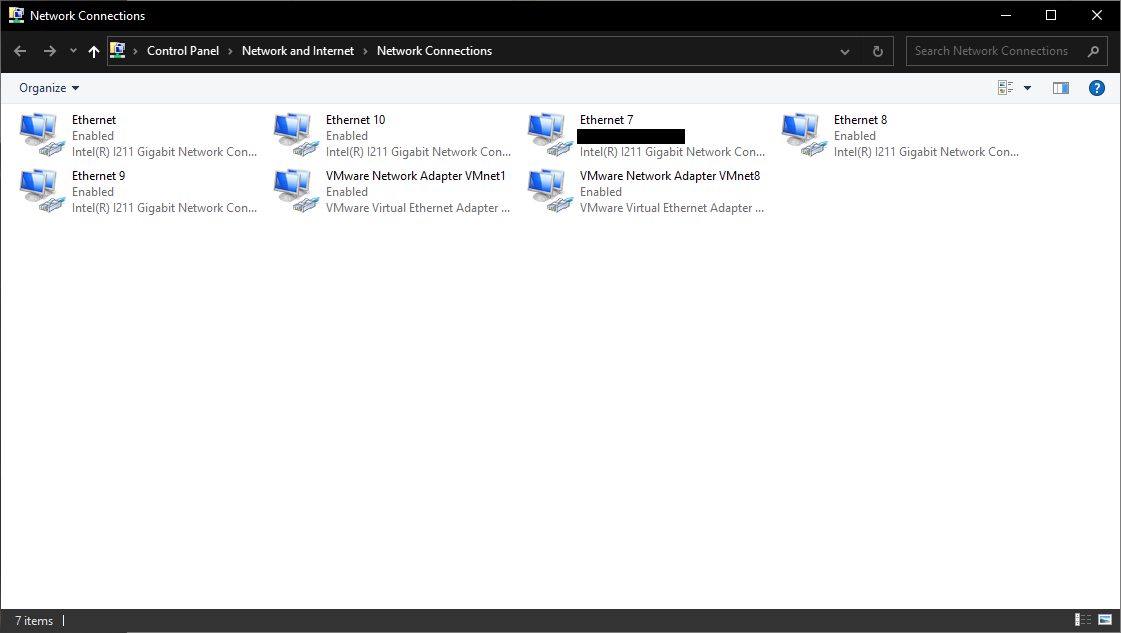
By adding all the VLANs, Windows will now display new adapters within the Network Connections tool (Control Panel). Ignore the VMware Network Adapters for now. You can now see that there are five I211 Adapters. One is the base physical adapter, with 4 virtuals for each VLAN.
My personal preference is to uncheck TCP/IPv4 and TCP/IPv6 on all VLANs that are going to be used for VMs only. I do not need additional IP addresses assigned to my PC, and by unchecking those features, they will not provide those services to the host. Right-click each adapter and go into their properties to change these settings.
Settings in my environment:
- WIRED (Untagged): TCP/IPv4 Enabled only
- STUDENT/INSTRUCTION/GUEST (Tagged): No TCP/IPv4 or TCP/IPv6
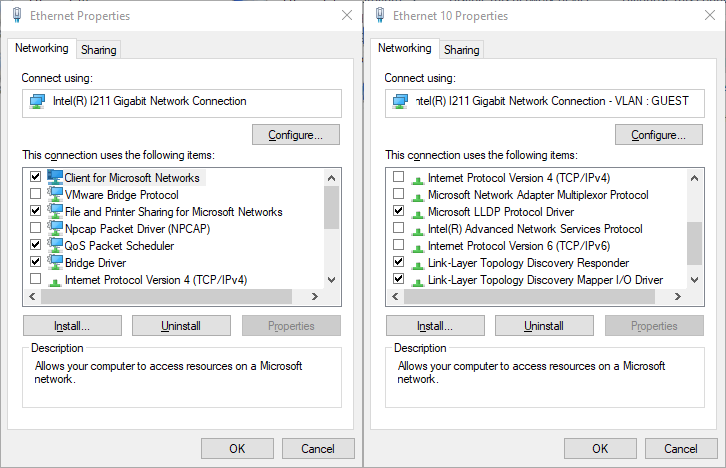 Left: Base Physical Adapter, no label/tag.
Right: Individual Virtual Adapter tagged with VLAN : GUEST
VMware Configuration
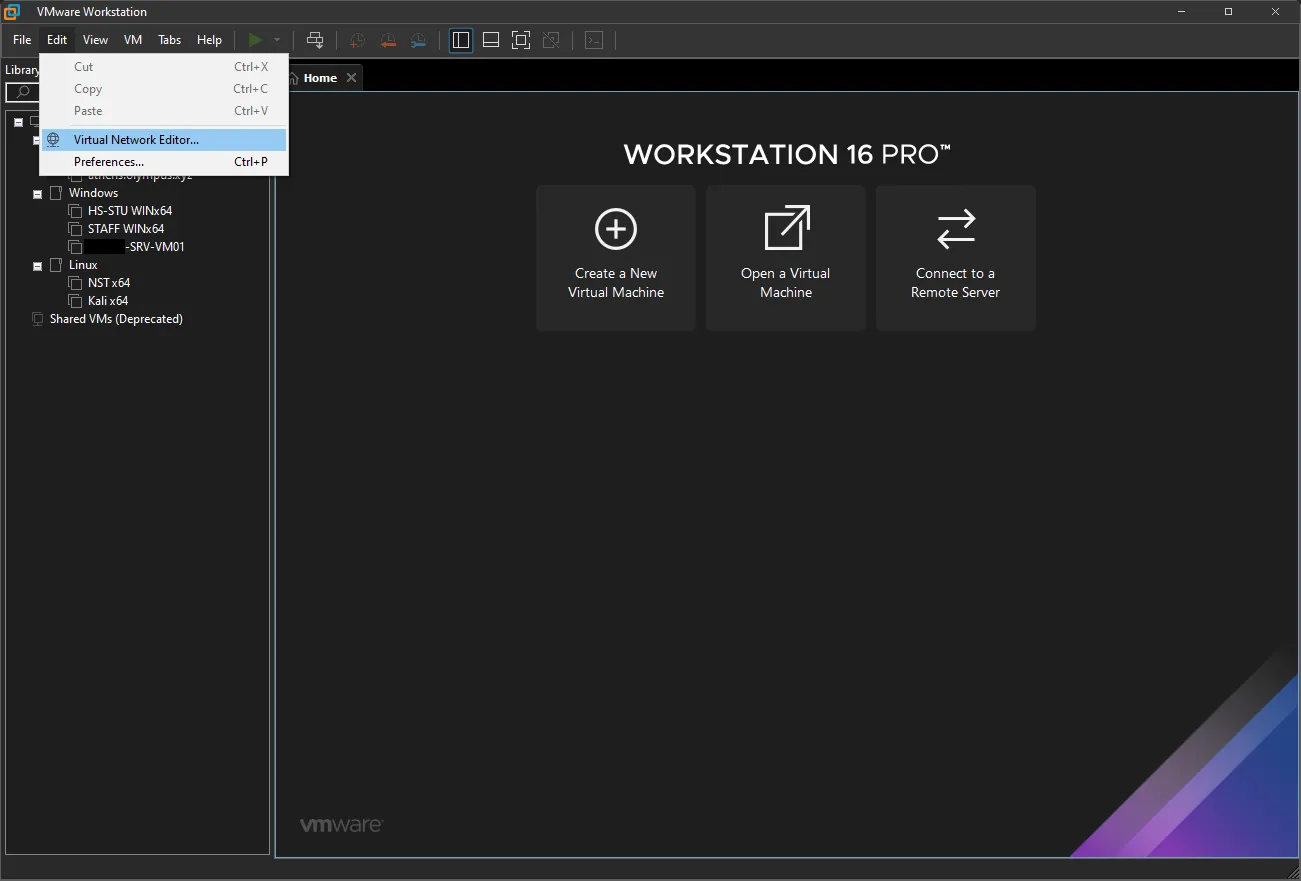
Now that the virtual adapters have been created and configured, we will move on to bridging them with VMware Workstation. In the Workstation software, go to Edit -> Virtual Network Editor.
When the window appears, click Change Settings in the bottom right.
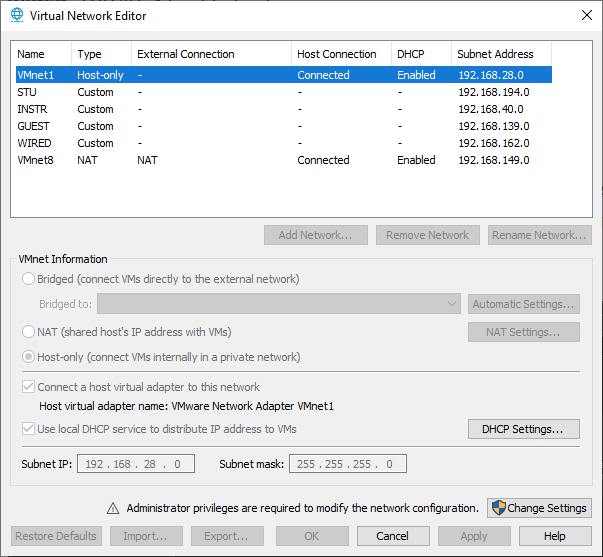
You’ll recognize VMnet1 and VMnet8 from the previous Network Connections screen. We’re going to leave those alone. VMnet1 is for communicating to our host machine only, and VMnet8 allows the VM to be NATed. We don’t want to do this.
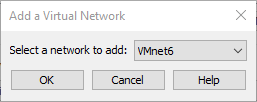
We want to assign VMs to different VLANs directly, by bridging them to the virtual adapter. Click on Add Network… and select a VMnet you want to assign it to.
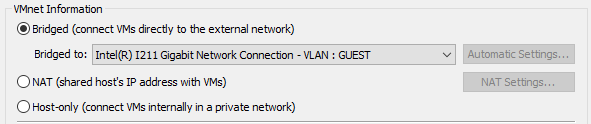
Select the new network in the list, then click the radial button next to Bridged. In the Bridged to: section, select the virtual adapter you want to use. They will be named exactly the same as they were in the Network Connections tool.
Lastly, you can click the Rename Network… button to give the connection a friendly name, instead of VMnetx. This will make it easier to identify when assigning connections in VM configuration. When you’re done, press OK. Do this for all VLANs you want to use within VMware Workstation.
VM Configuration
The last thing to do is assign the connections you just created to VMs. In the Virtual Machine Settings for your VM, select Network Adapter.
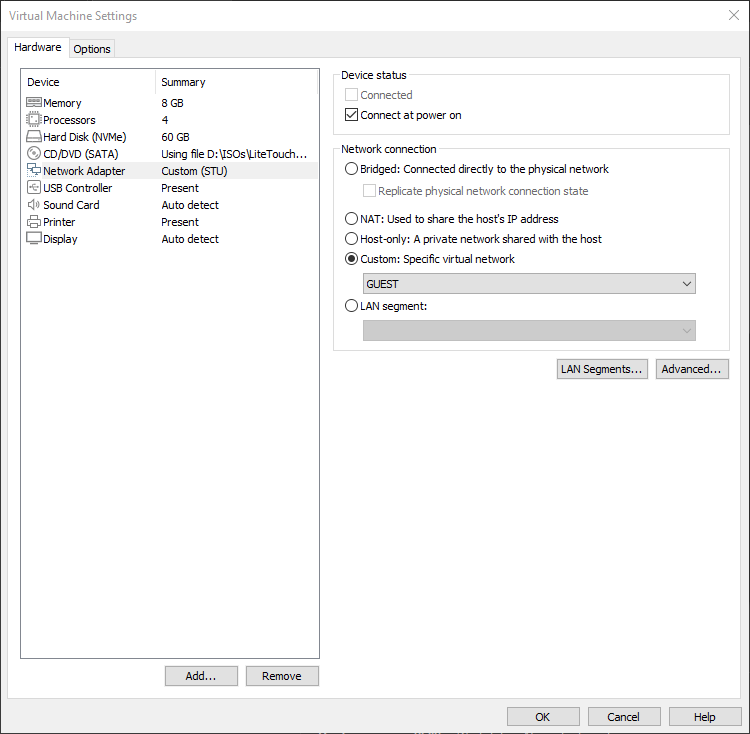
Select the radial button for Custom: and then choose the connection you want to use. I renamed one of the VMnets to GUEST, so I can easily identify the VLAN/network. You’re done! If the VM is currently running, you will need to renew the DHCP lease or statically assign a new IP from the network the VLAN resides in.
Changelog
- Initial Release
- 2021/06/16
- Updated Software with Windows 10 Pro
- 2021/07/10
- Add Update section
- 2024/02/09